This post may contain affiliate links. Please read our Disclosure Policy for details.
Nailhead headboards are all the rage! And why wouldn’t they be? They’re a classic and timeless staple in any size and any bedroom. They give off a warm and cozy, yet chic and sophisticated vibe in their multitude of styles-tufted, flat or curved, to name a few. What I love about them is that they help marry differing styles. So if you and your partner butt heads with contemporary vs. traditional, this will satiate both preferences and help the two styles blend together well by serving as a transitional piece between the two. They can be dressed in any variety of fabrics-solid or patterned, and the nailheads themselves come in an array of sizes, shapes and colors. Along with coming in a variety of shapes, sizes, and colors, nailhead headboards also span the gamut from relatively inexpensive to break-the-bank. I’ve even seen some really horrible quality versions at big-box warehouse clubs for dirt cheap prices, where the nail heads were so crooked that they’d fail a field sobriety test. Go home headboard, you’re drunk.
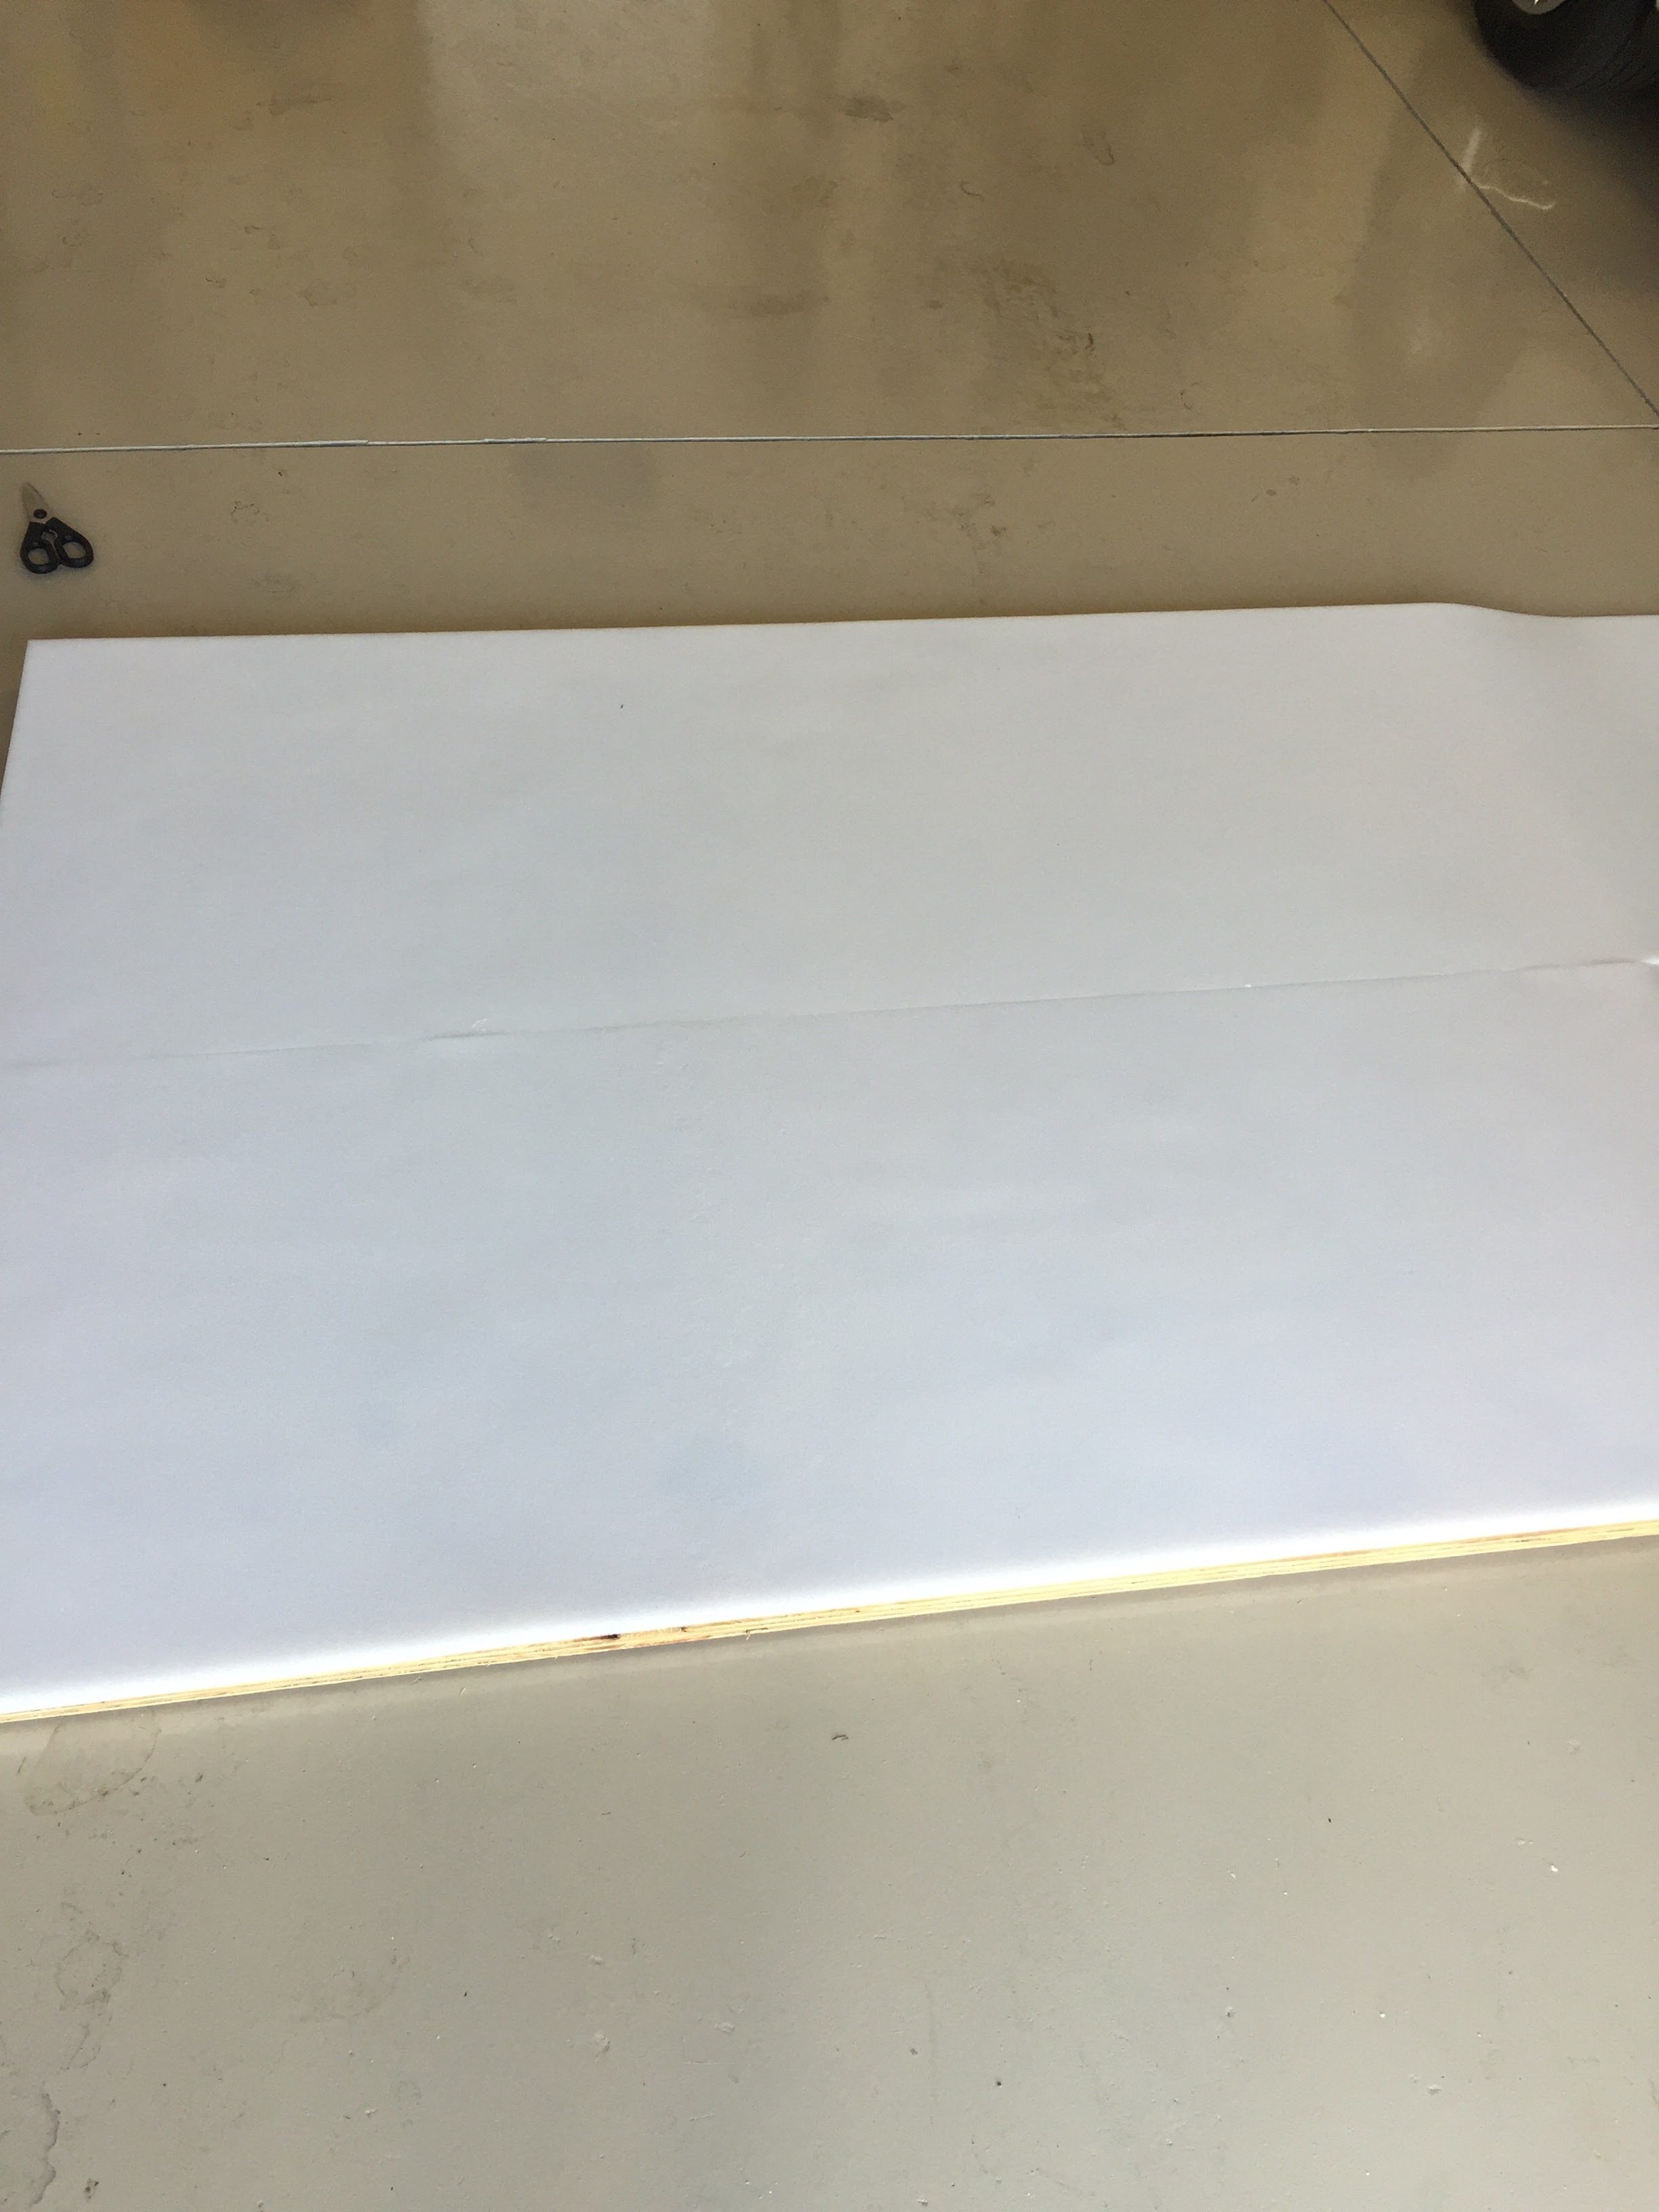
When I decided to do a DIY makeover of our guest room, I researched prices on nailhead headboards and determined that my top picks would eat up half of my allotted budget. So, I did some research and priced out the cost of materials to make my own headboard. I visited my local big box home improvement stores for price comparisons and product availability and found the exact materials that I needed. I went to the lumber department and found a piece of plywood that had a decent sized thickness for my needs. I didn’t want the headboard to feel too thin and insignificant or look like a total amateur DIY job. I brought the dimensions of a queen sized headboard with me and had the gentleman in the lumber department cut the piece of plywood down to size. *Note: based on the size of this piece of wood, it would not fit in the trunk of a standard SUV. I drive a badass minivan (which I swore I would never drive, but that’s another story for a different day) and it was a bit of a challenge to get it in the back. Make sure the person helping you at the store is skilled at Tetris, because the dude helping me clearly flunked geometry and ended up cutting my hand after I told him to wait while I rearranged my car setup before he rammed the piece of plywood through the trunk. I advise removing all car seats and headrests and sliding it in on an angle if it won’t fit with the seats folded down. If you have a pickup truck or can rent a truck from your local big box home improvement store, that’s another great way to go. Another option is to tie it to a roof rack.

Next, I visited my local craft store. I flipped through a large selection of fabrics in an array of colors and patterns. I ultimately decided on a thick gray tweed that I felt would tie together the colors in the room from the paint color on the wall, to the bedding, to the curtains. I liked that the material was opaque and mimicked a canvas material, as many of the lighter color fabrics were more see-through. After discussing my DIY project with the helpful lady in the fabrics department, we determined the amount of fabric needed for my headboard. This also made it easier to decide how much foam and batting to purchase from the store.

When I got all of my materials home, I laid the plywood out on the floor of my garage. I unrolled the foam and laid it out exactly how I wanted it to be on the plywood. Using my marker and a ruler, I drew a line to indicate where to cut off the excess foam. Once the foam was cut down to match the size of the plywood, I put on my rubber gloves and ensured that the garage door was open to provide ventilation for the next step. Lifting up one end at a time, I carefully sprayed the adhesive onto the back of the foam and firmly pressed it into place on the plywood.
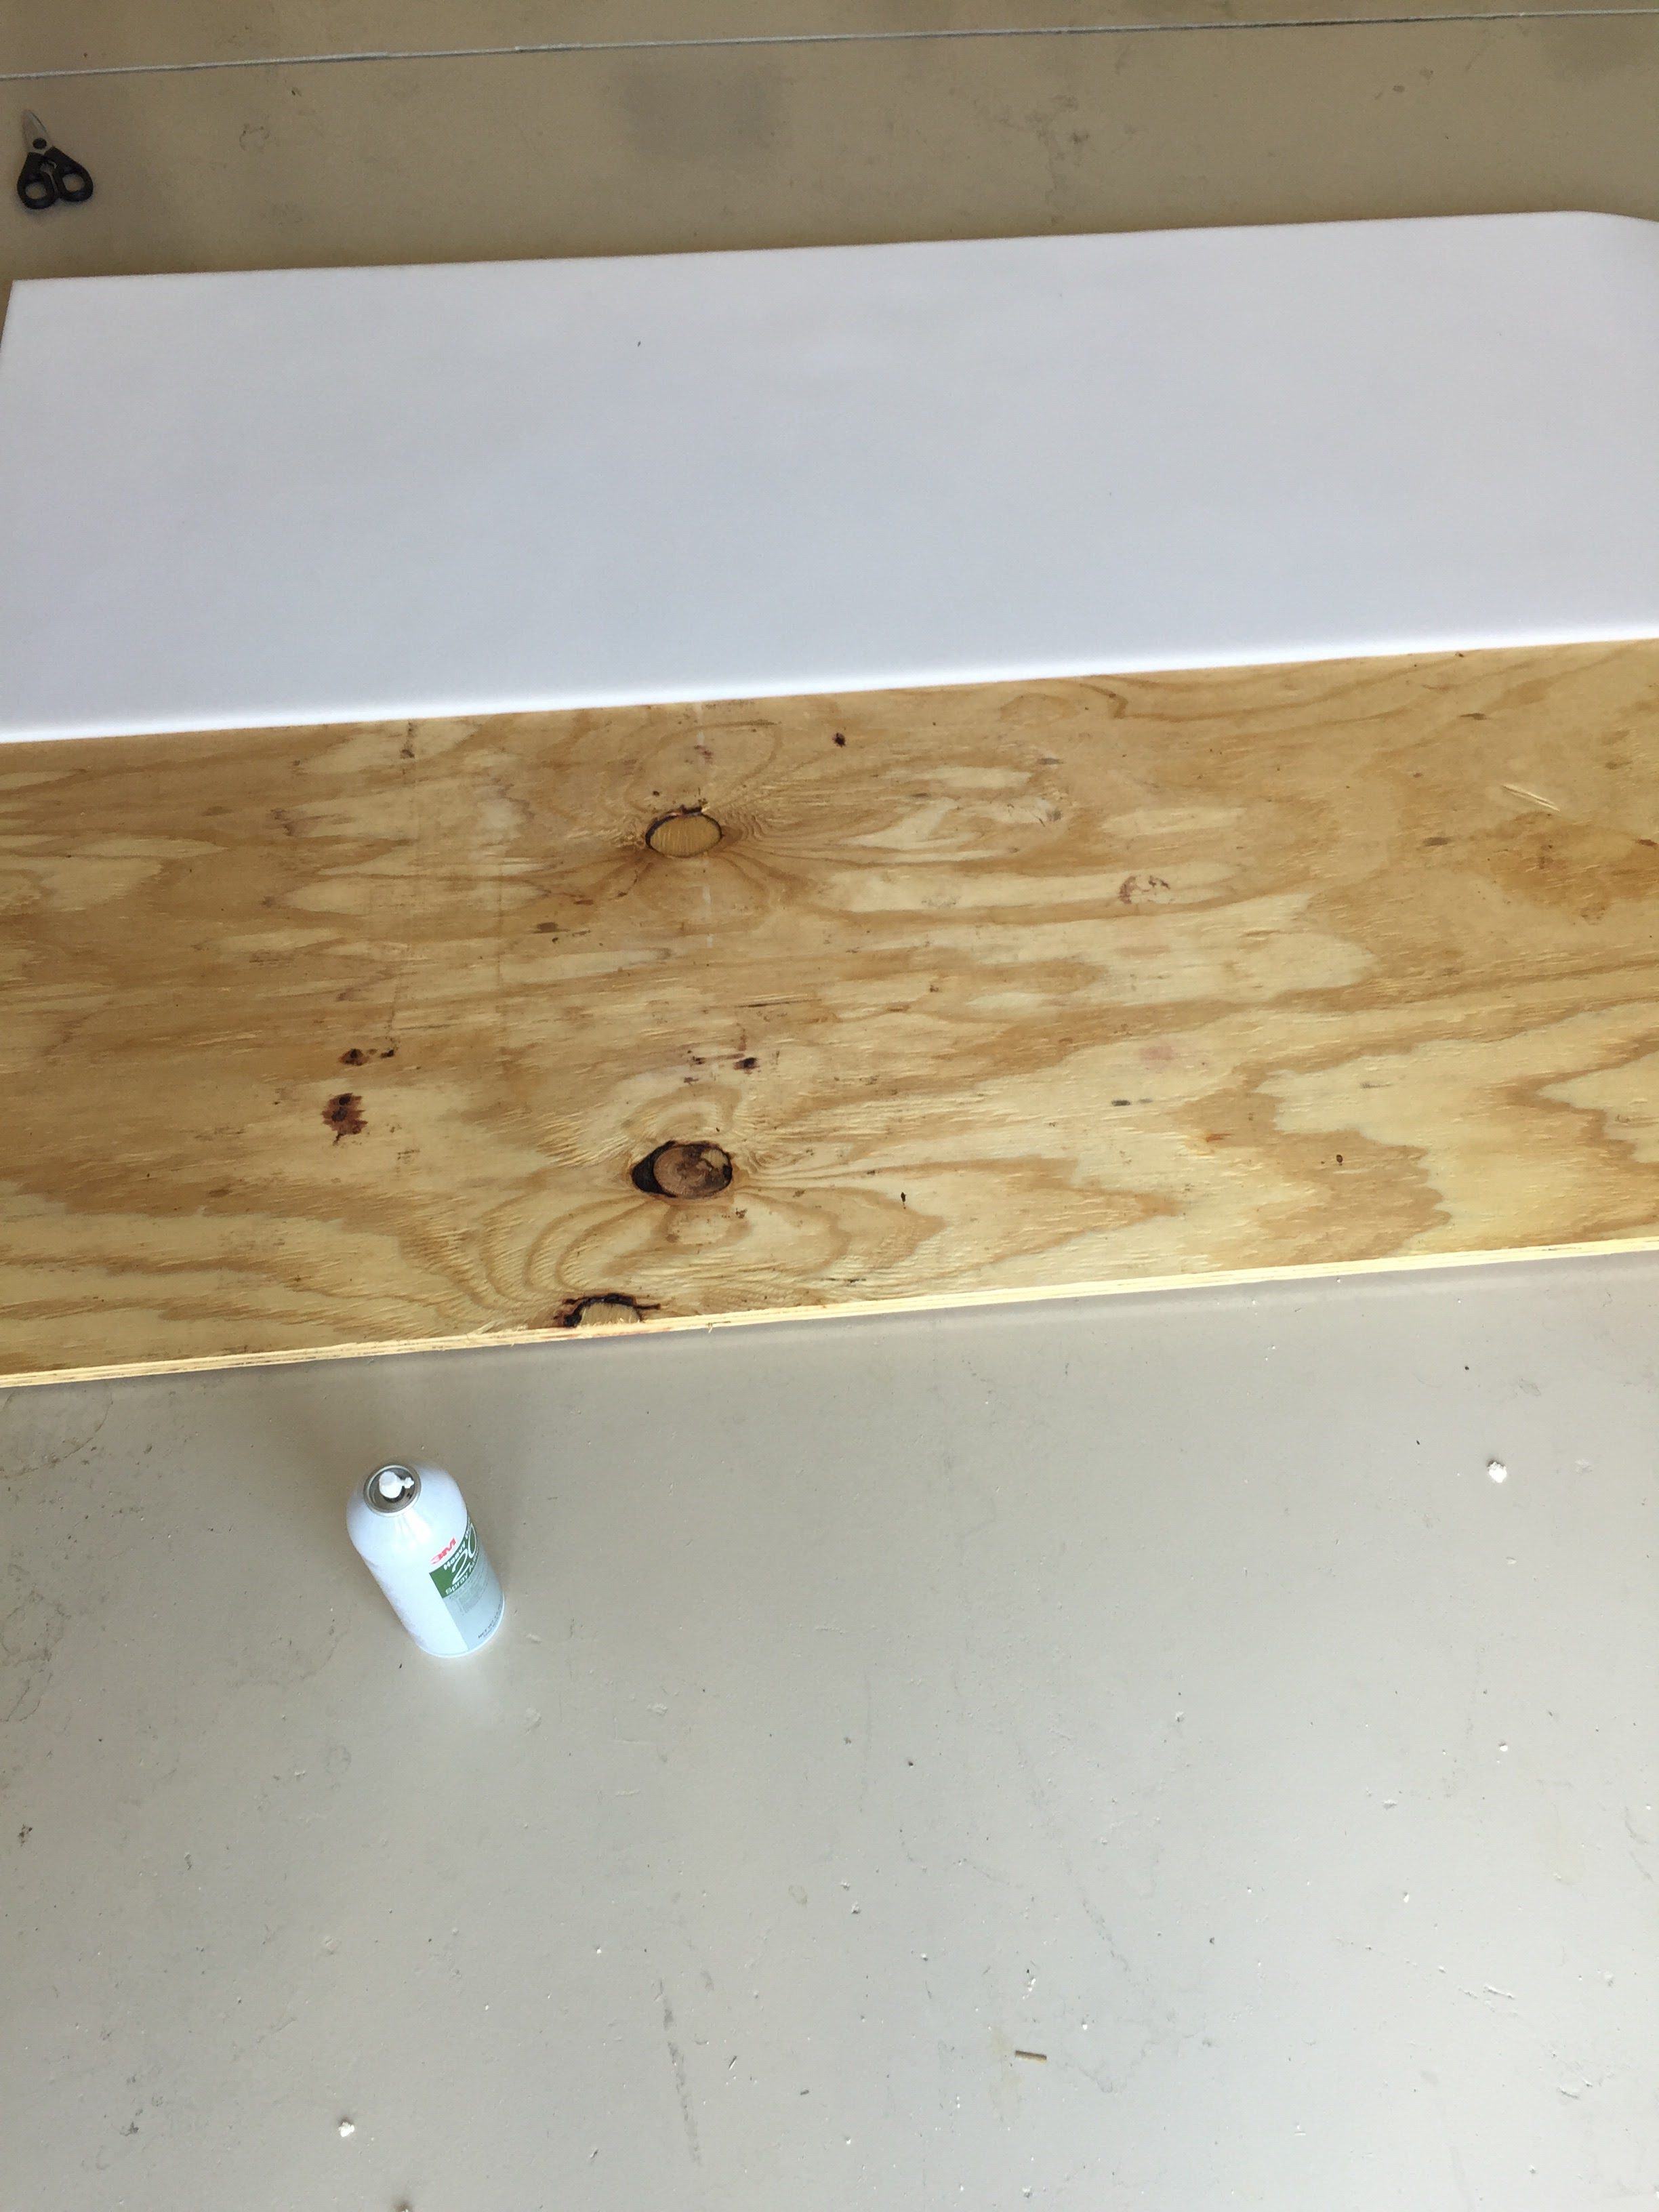
I repeated this step for each side of the foam to ensure that it was all generously covered with adhesive. The adhesive dries rather rapidly, but I allowed it to cure for a few hours to ensure that the strong odor would dissipate.
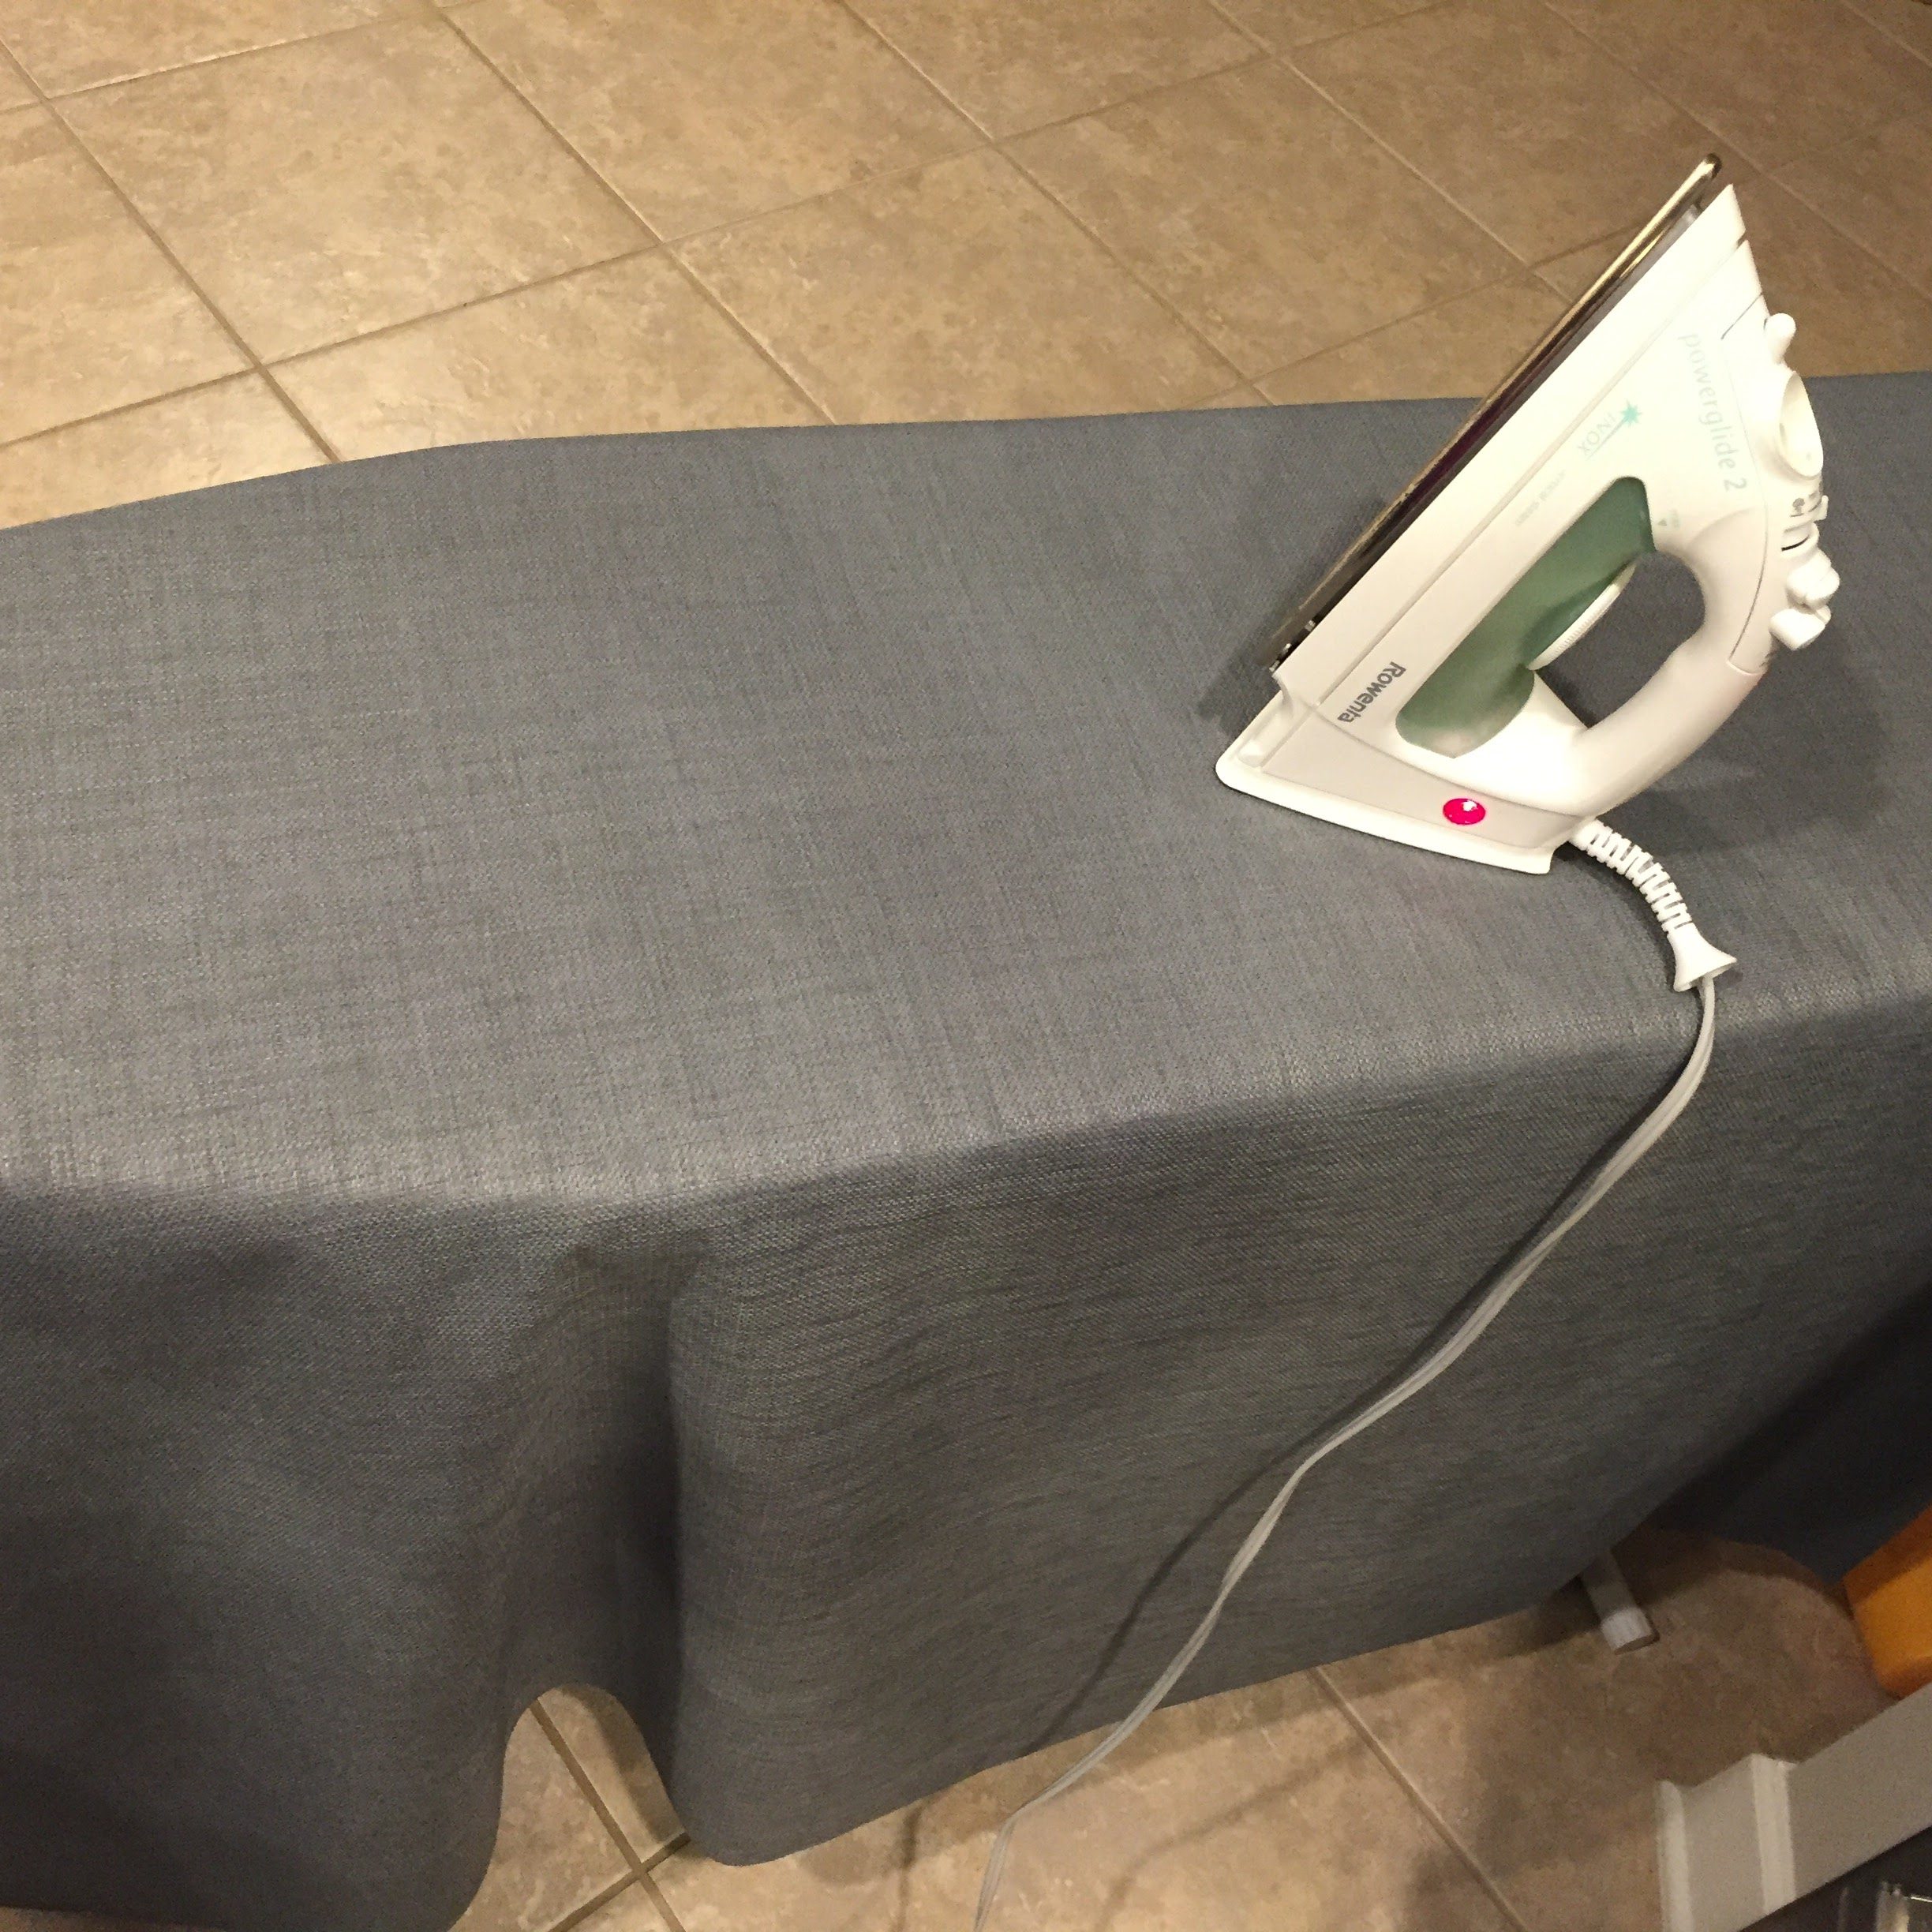
In the meantime, I ironed the wrinkles and creases out of my piece of fabric that would be covering the headboard.
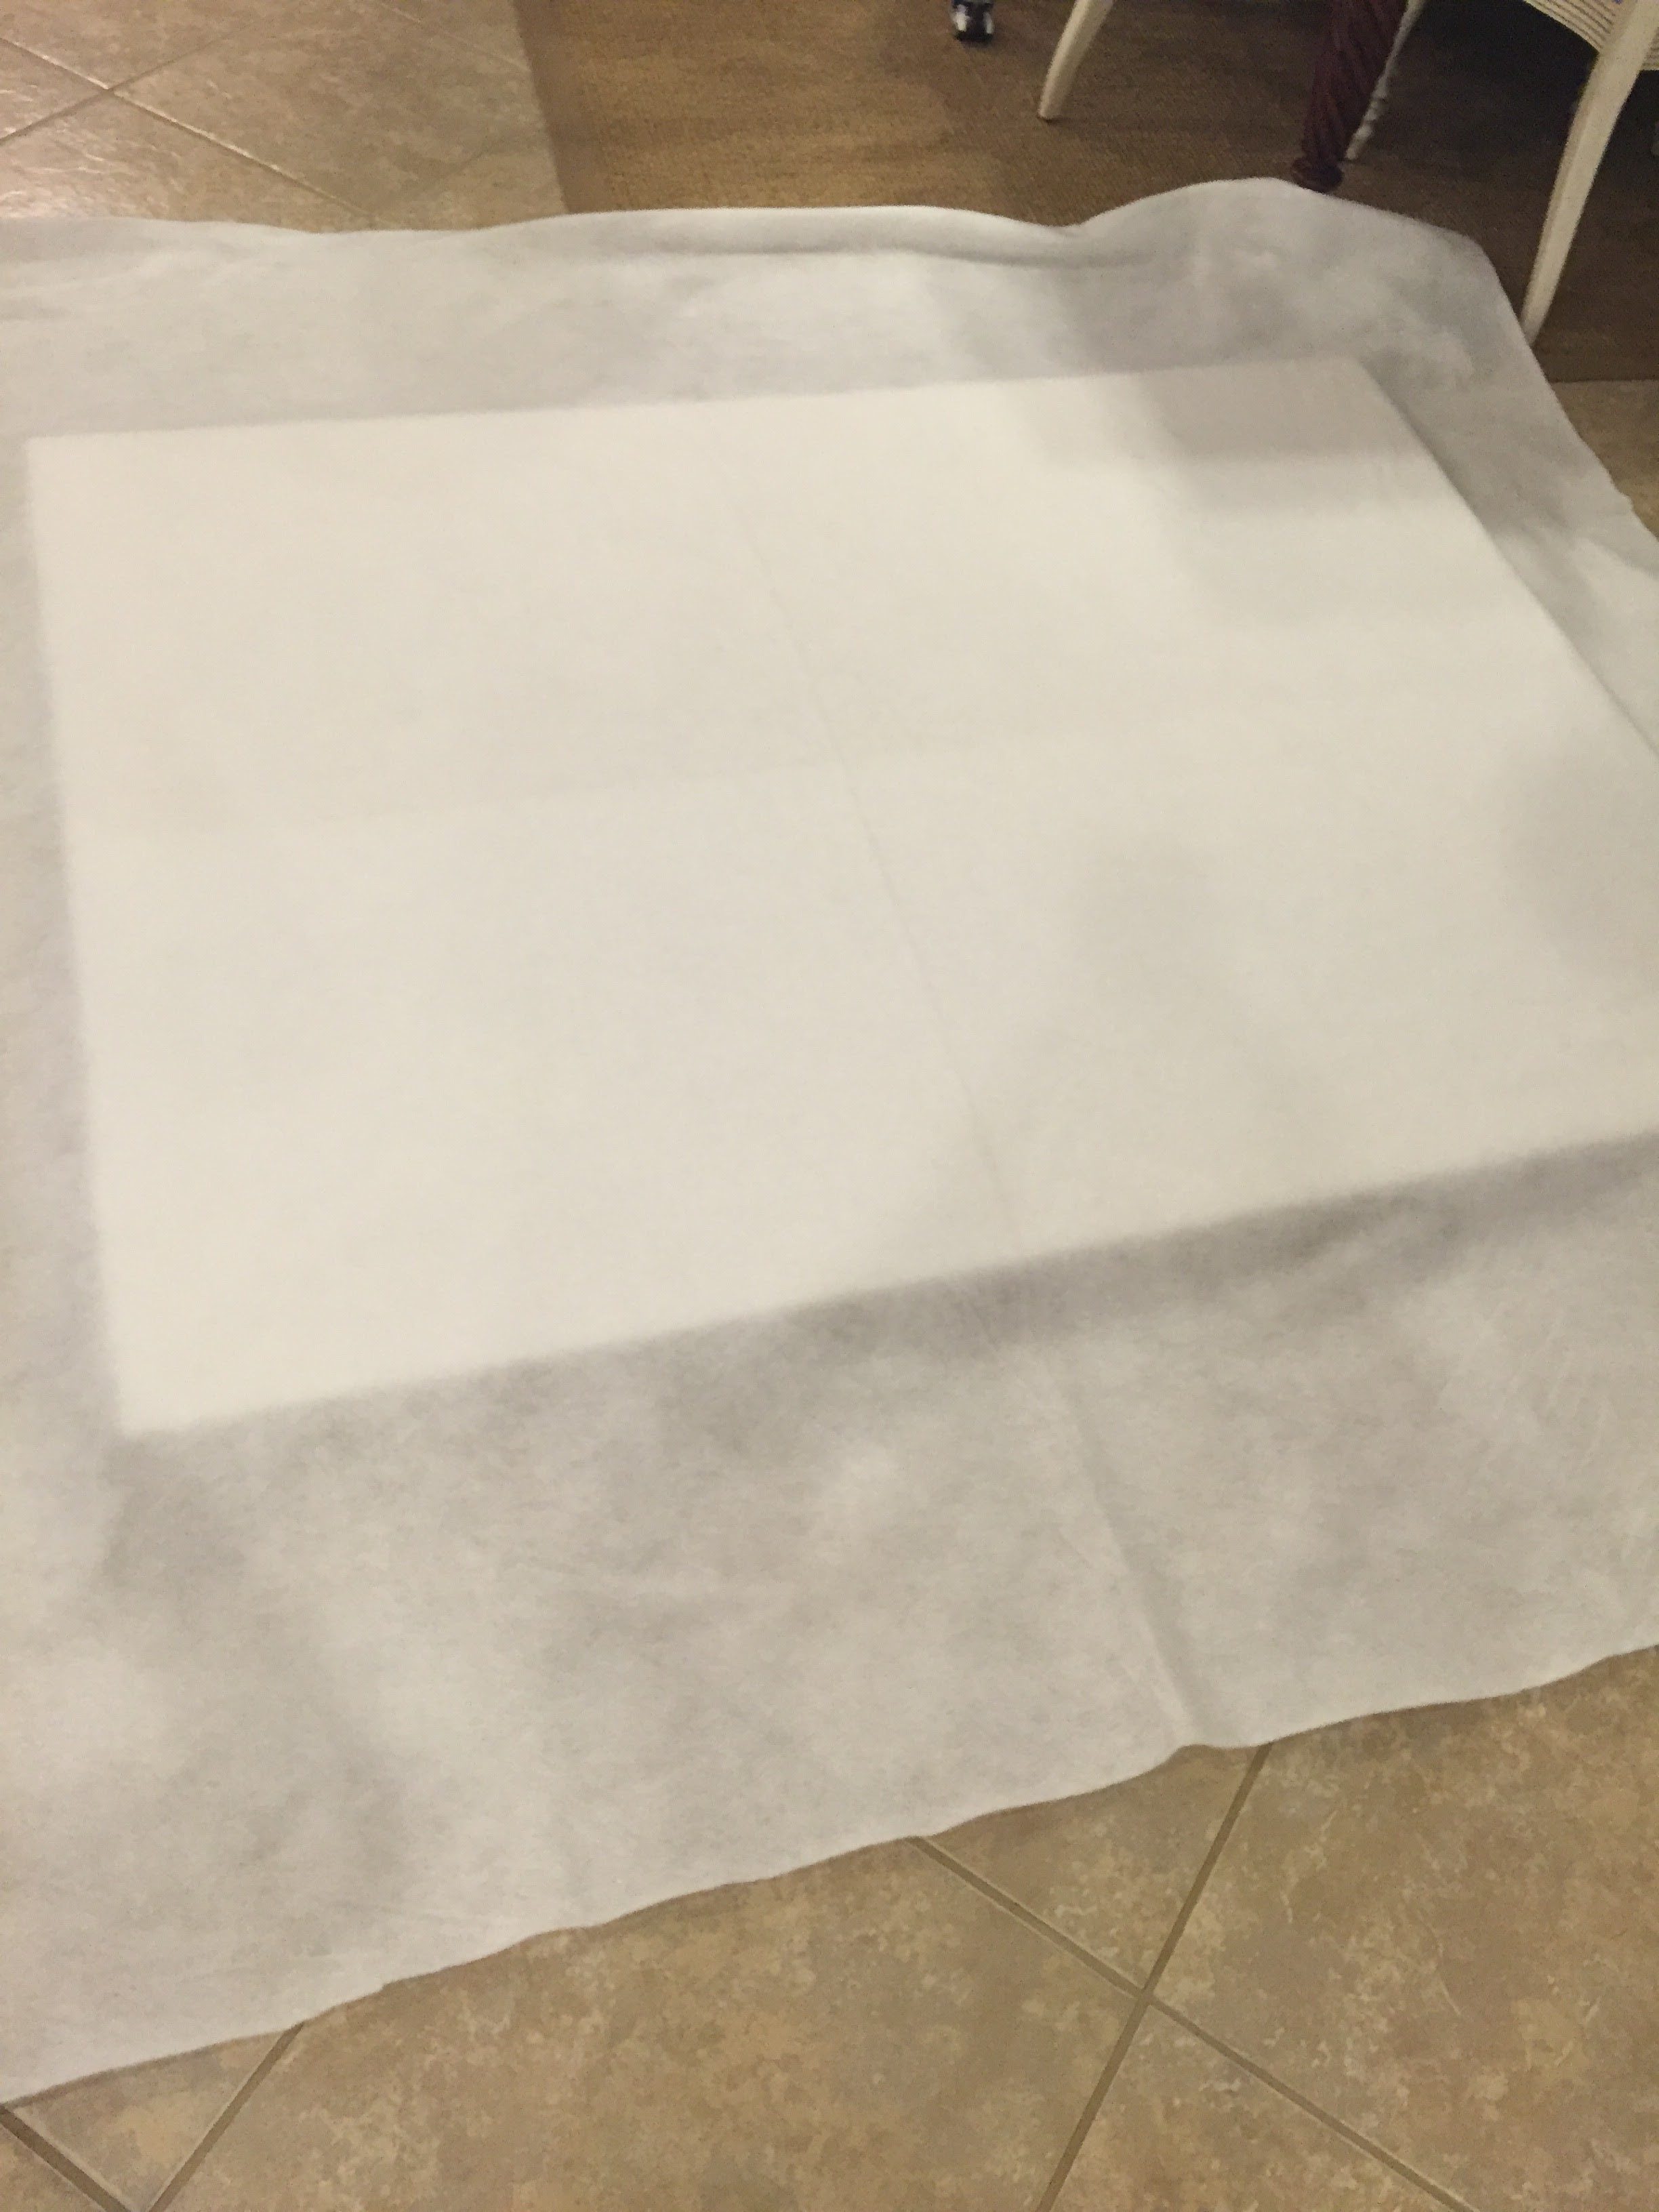
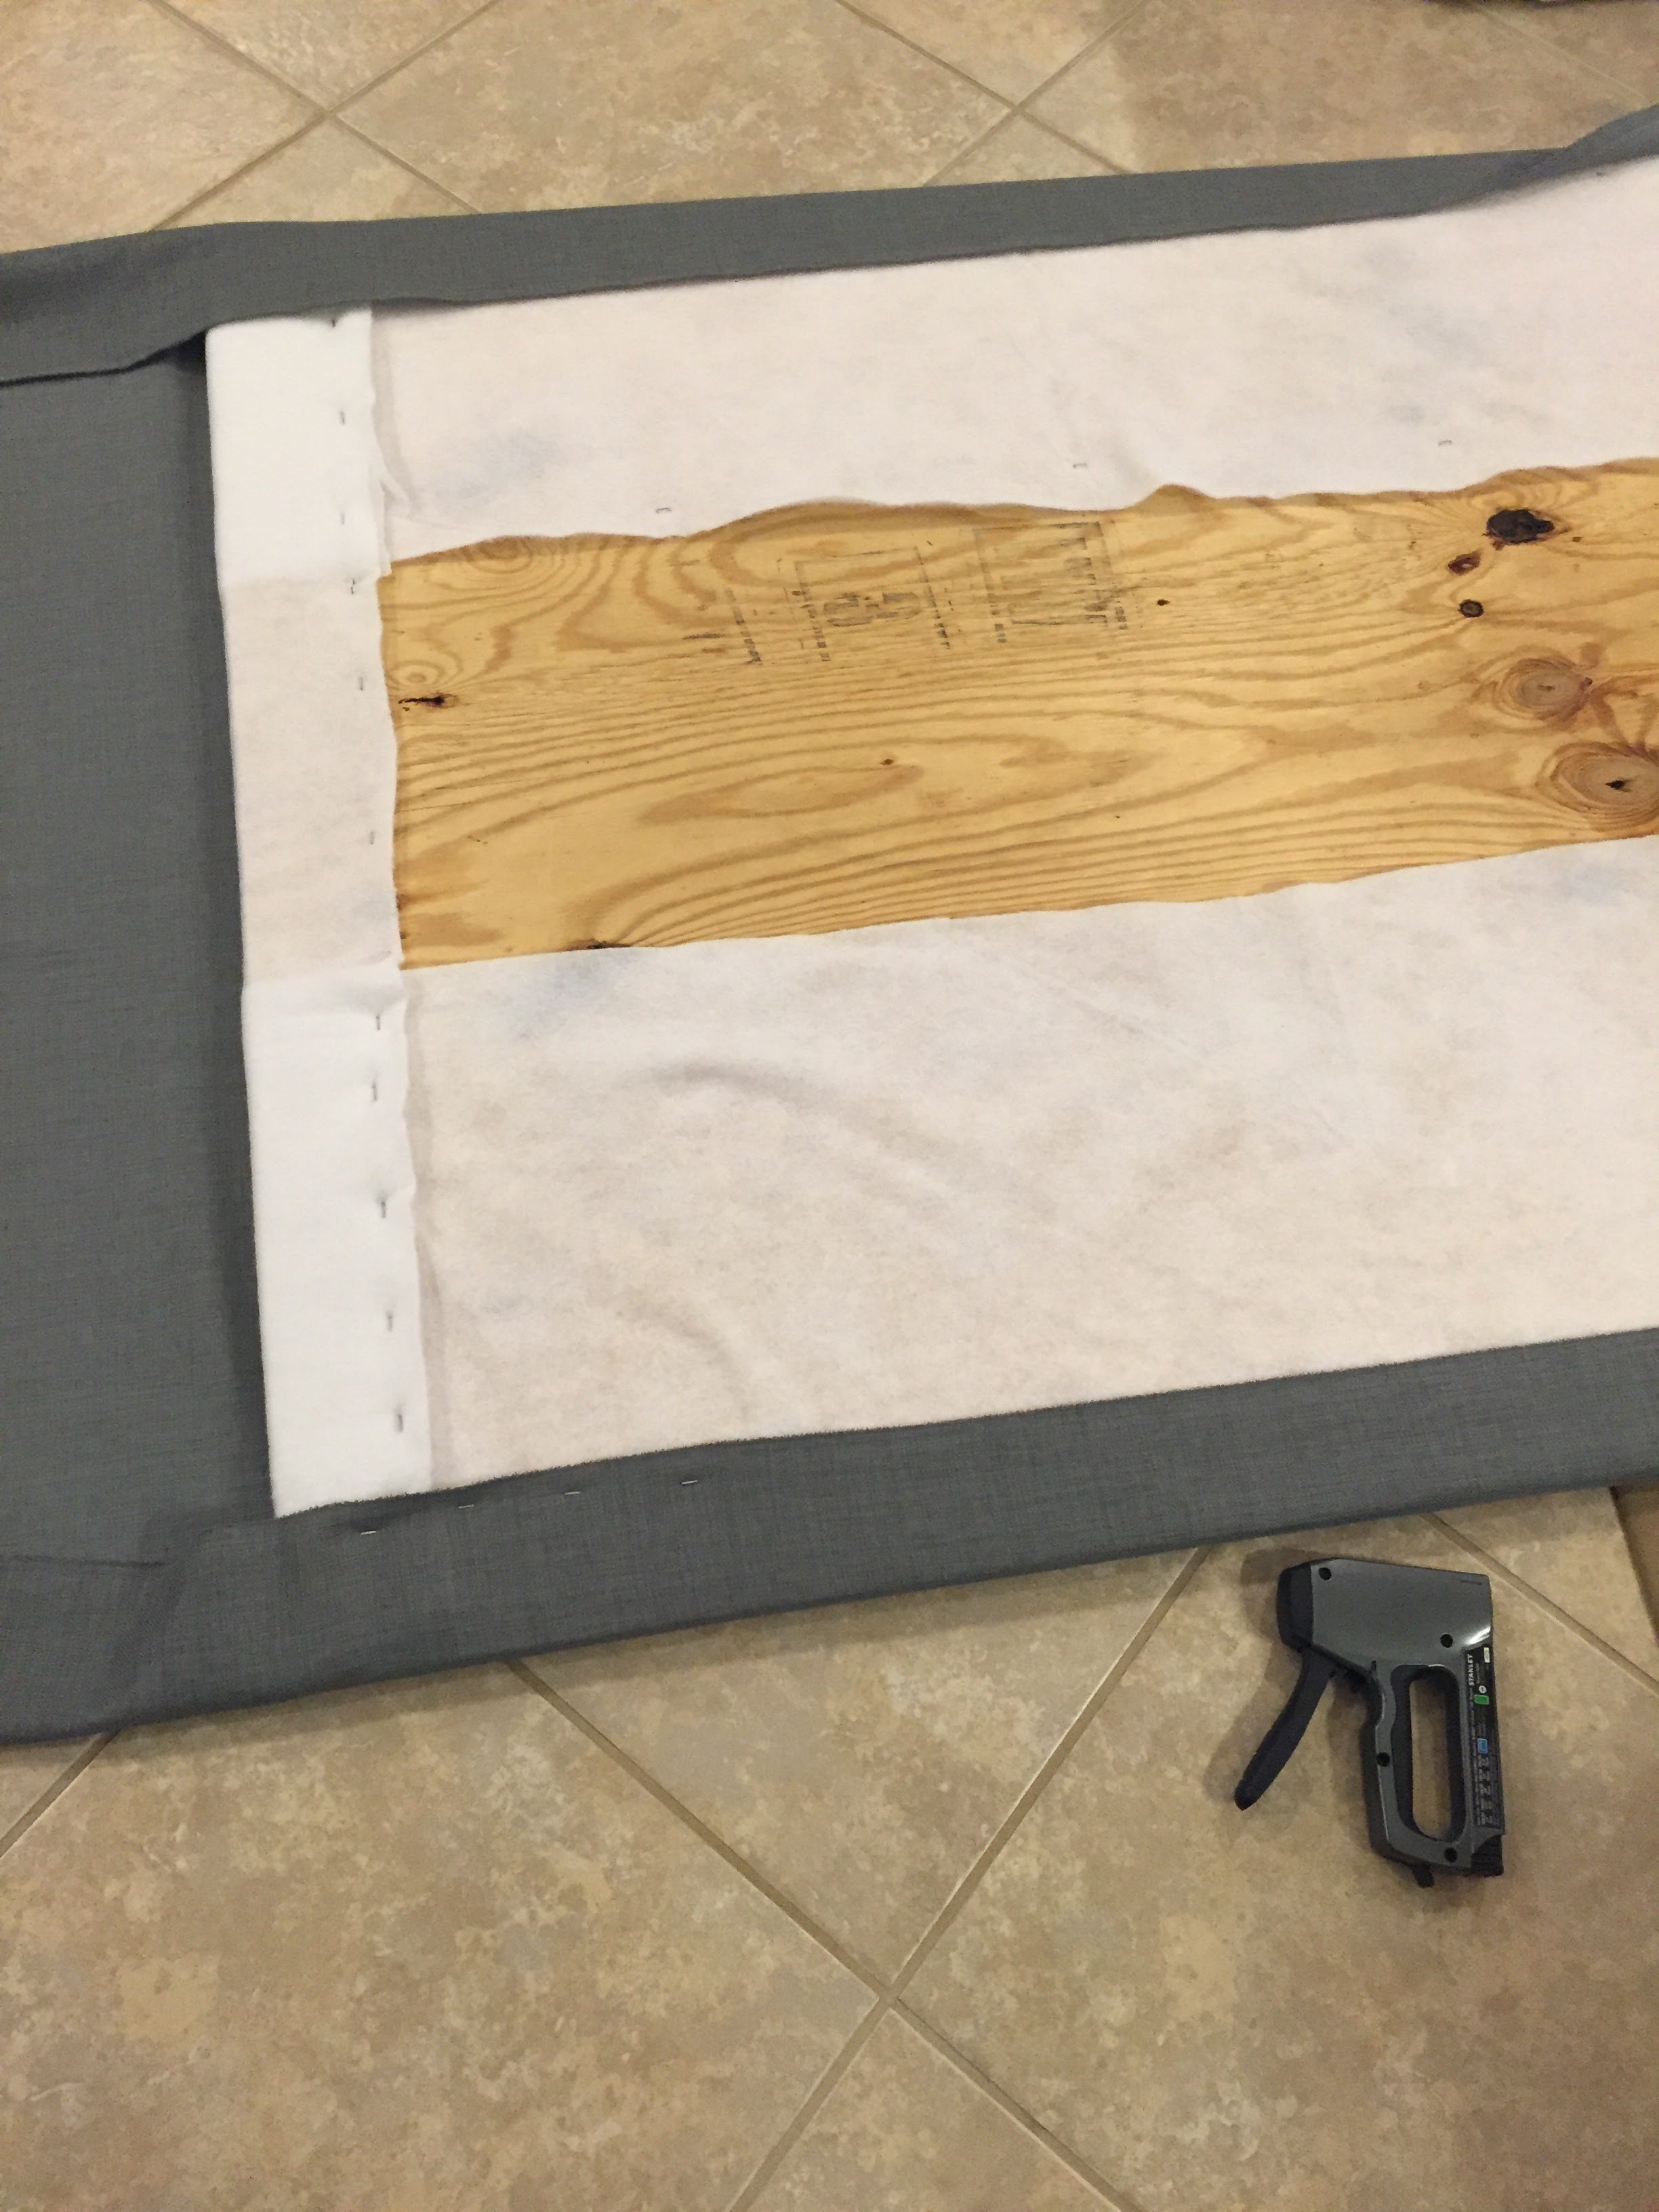
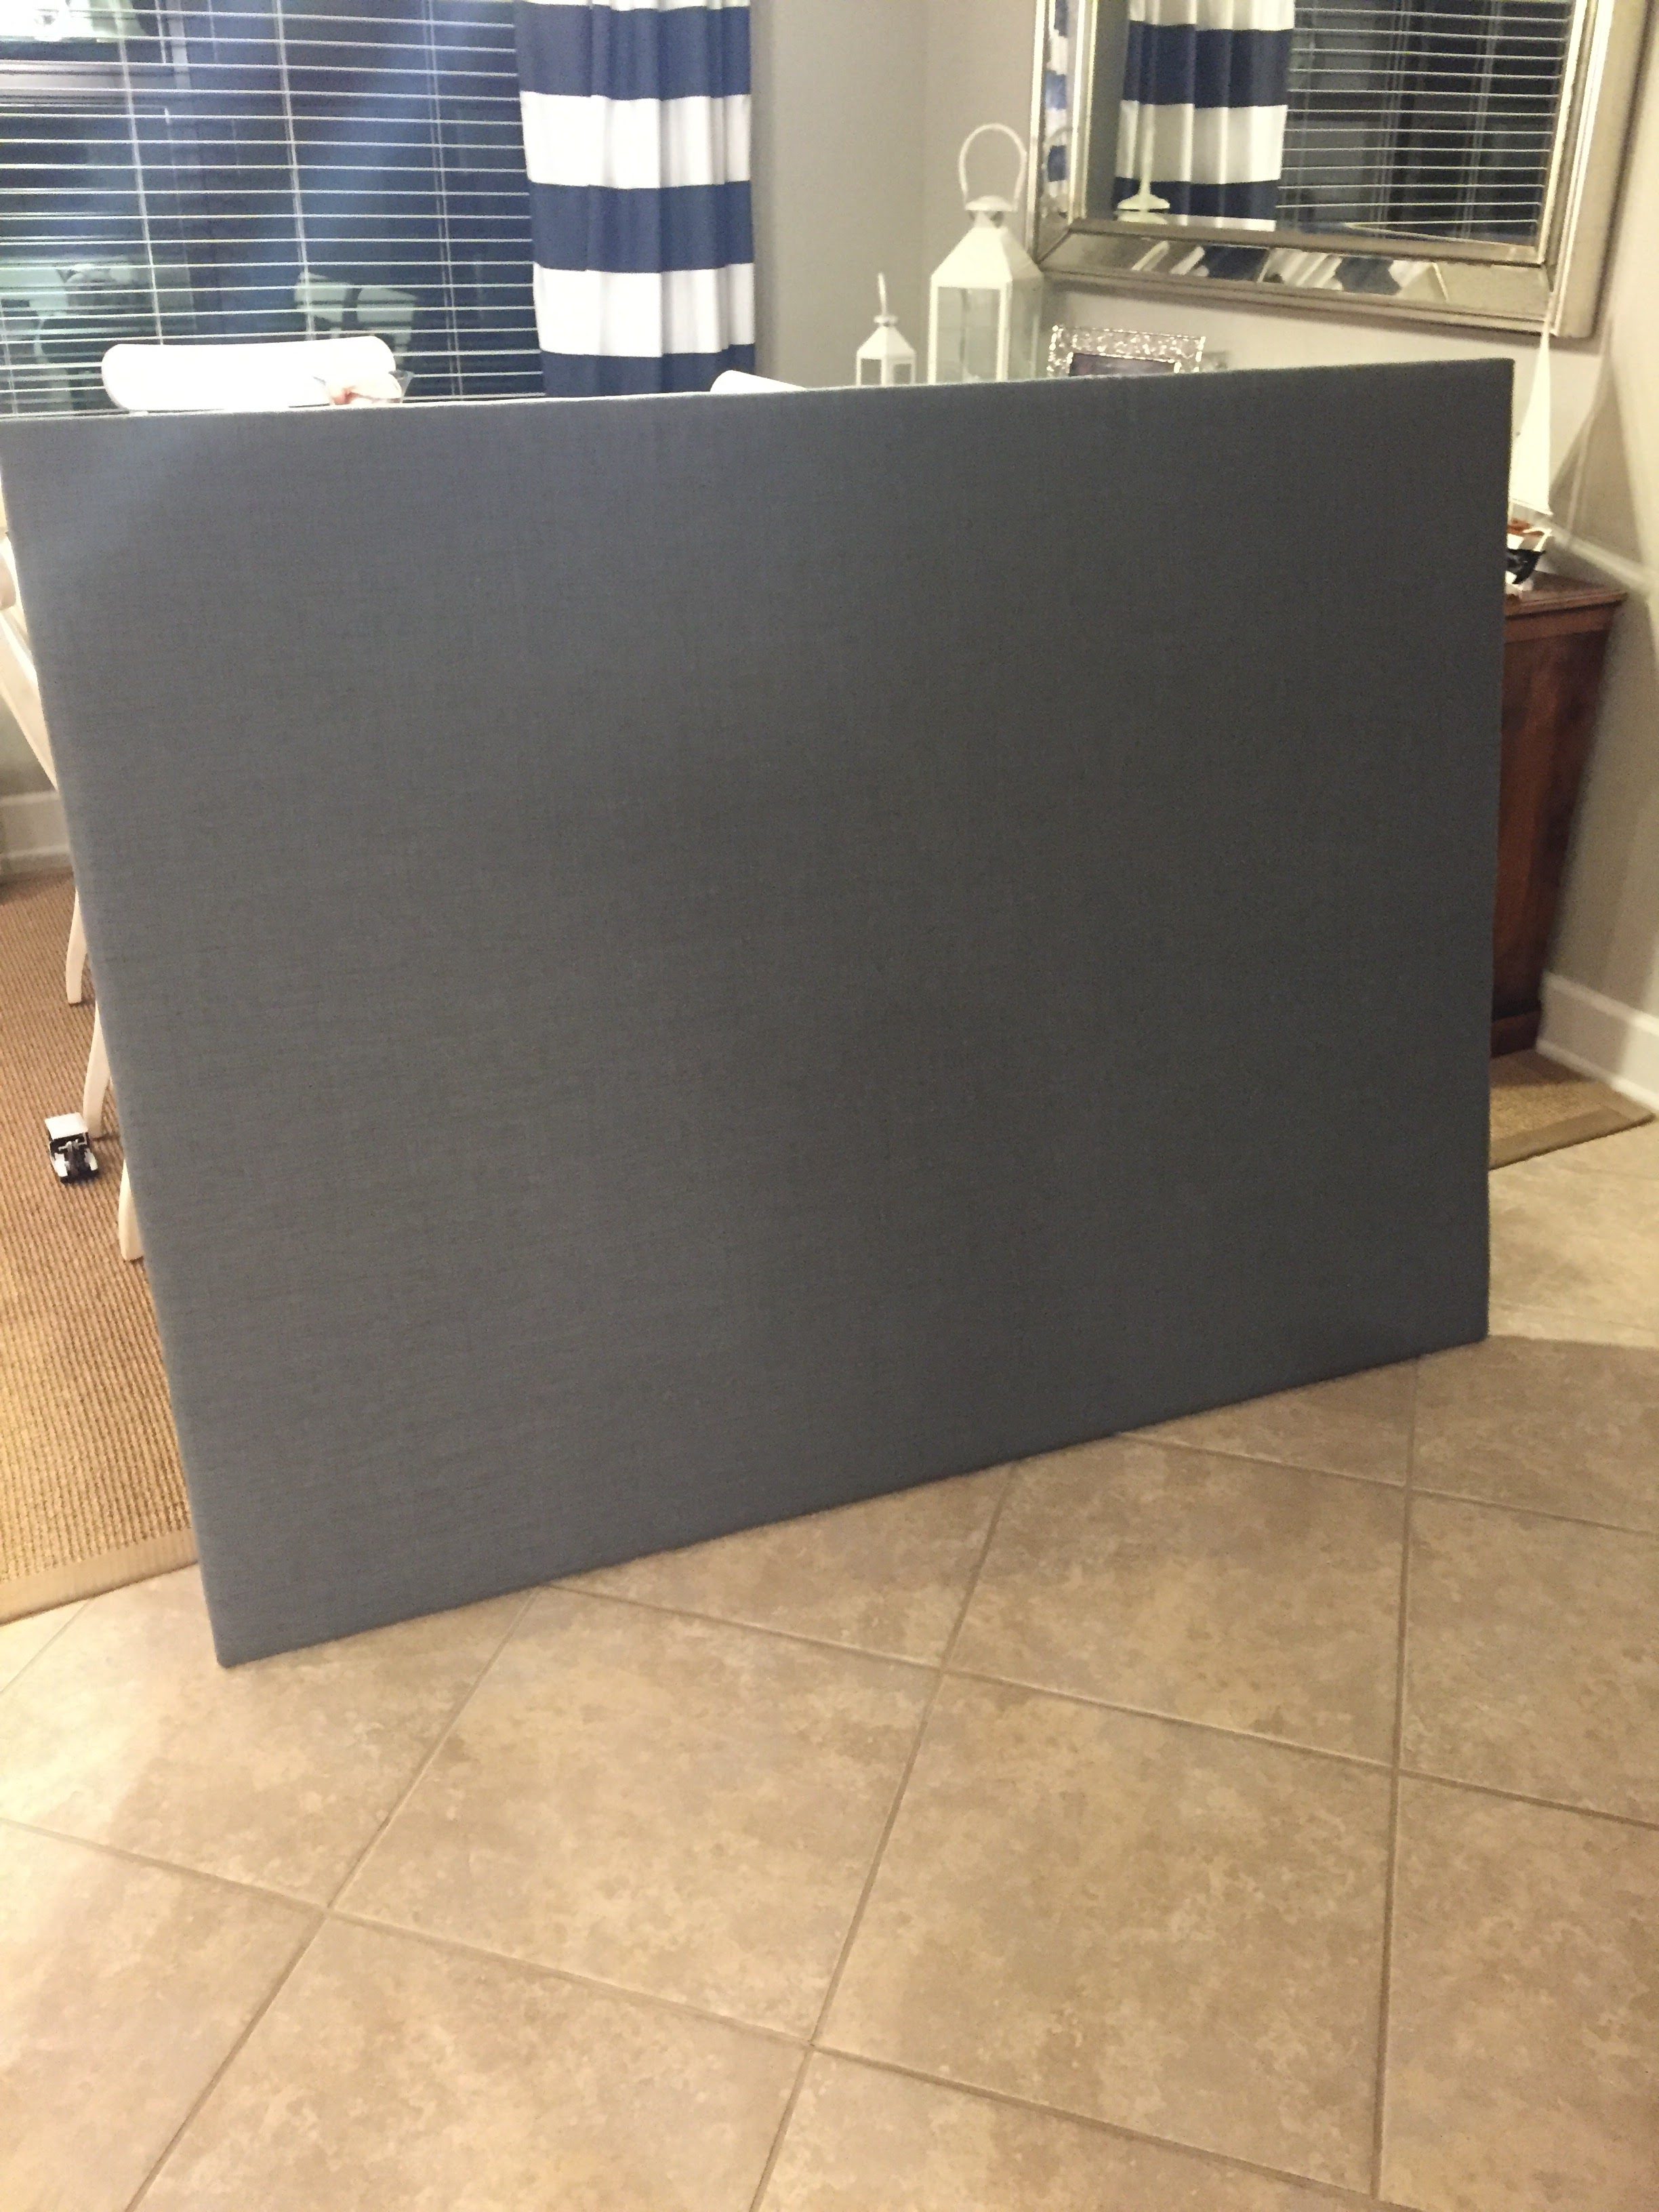
Once the adhesive was dry and the foam was intact, I brought the piece of plywood into my house and laid it out on a clean and empty area on the floor, with the foam side facing up. I covered the entire piece with batting and ensured there was enough batting material to wrap around all four sides evenly.
I used clamps to hold the batting in place and then flipped the entire piece over with the batting side down. I immediately removed the clamps and made sure all of the batting was taught on all sides. I folded one edge over the back of the plywood and began stapling it in place.

I repeated this on all four sides, ensuring that the batting was tight throughout.
Next, I repeated the above steps for the fabric.
Lookin’ good! Now for the tedious part-the nailheads. This step requires a lot of patience and attention to detail. First, measure how far you want the nailheads to be from the edge of the plywood. Use a laser level to ensure the line is straight. I used painter’s tape to secure the laser level to the surface of the headboard to be sure the line wouldn’t move. If you don’t have a laser level, you can measure it out as concisely as possible manually, and mark the line. I like to use chalk to mark the spot instead of a pen, a pencil or a marker, since it’s easily removable. Next, decide how far apart you’d like to space your nailheads.
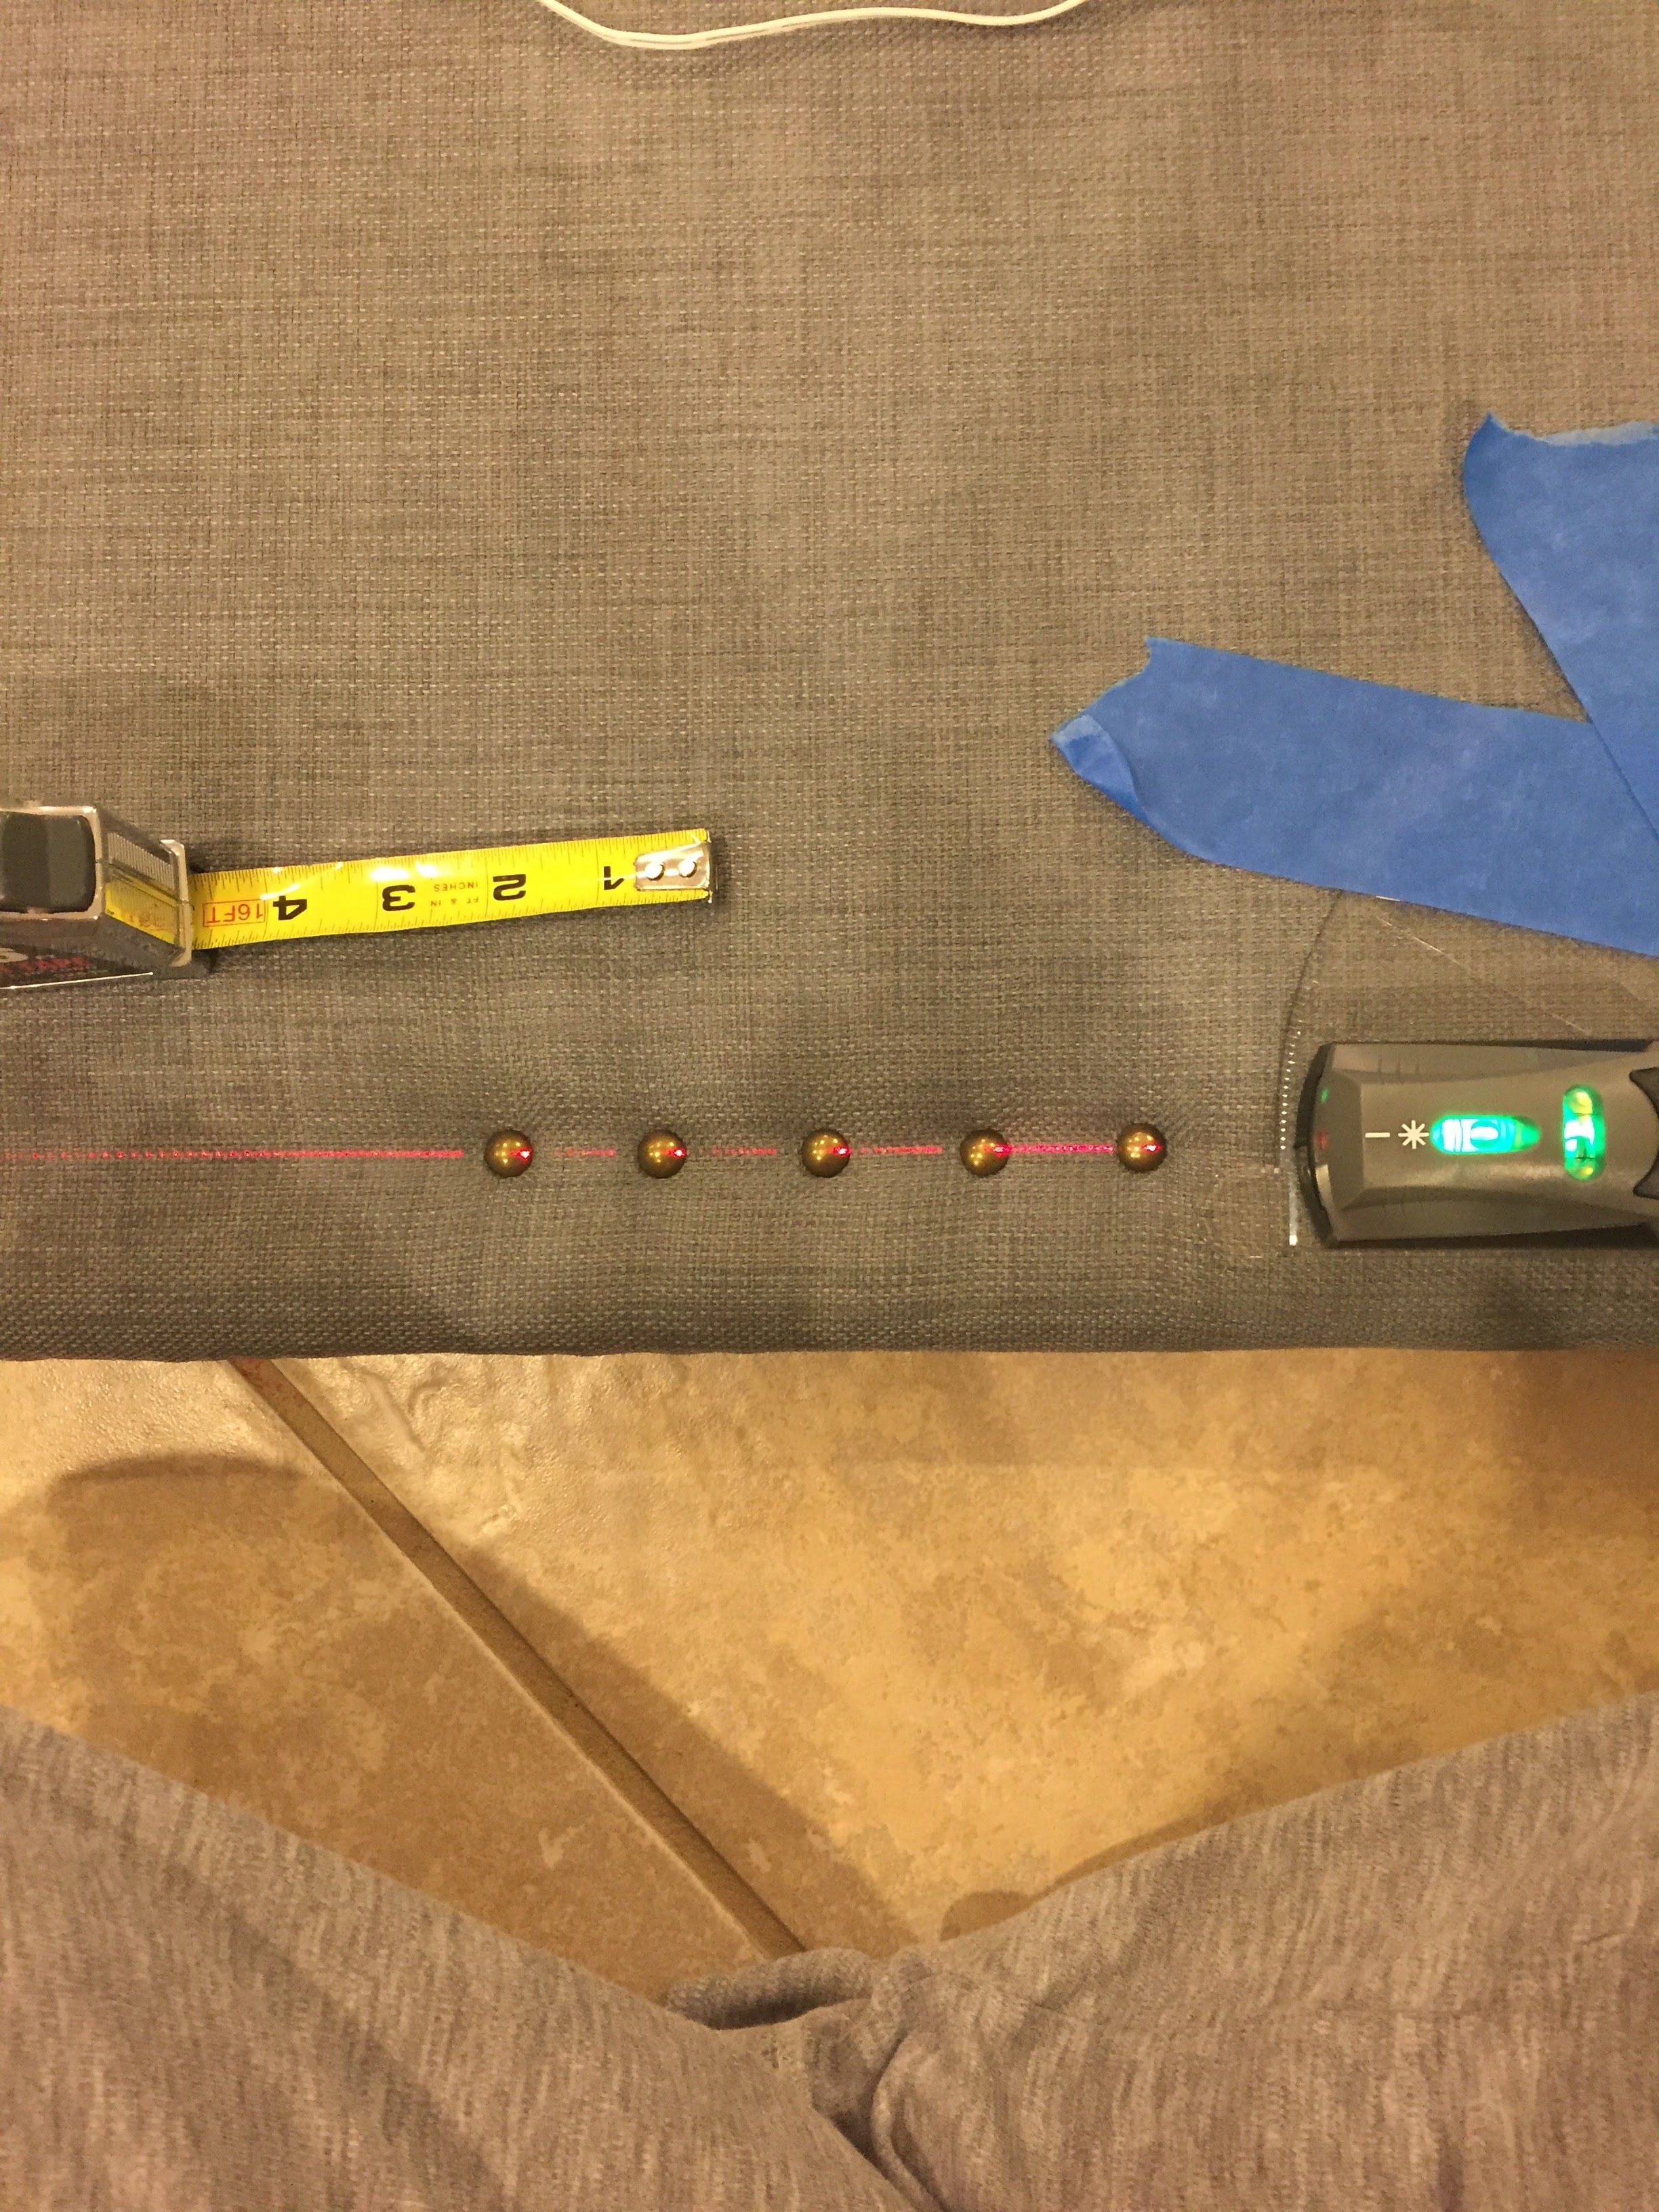
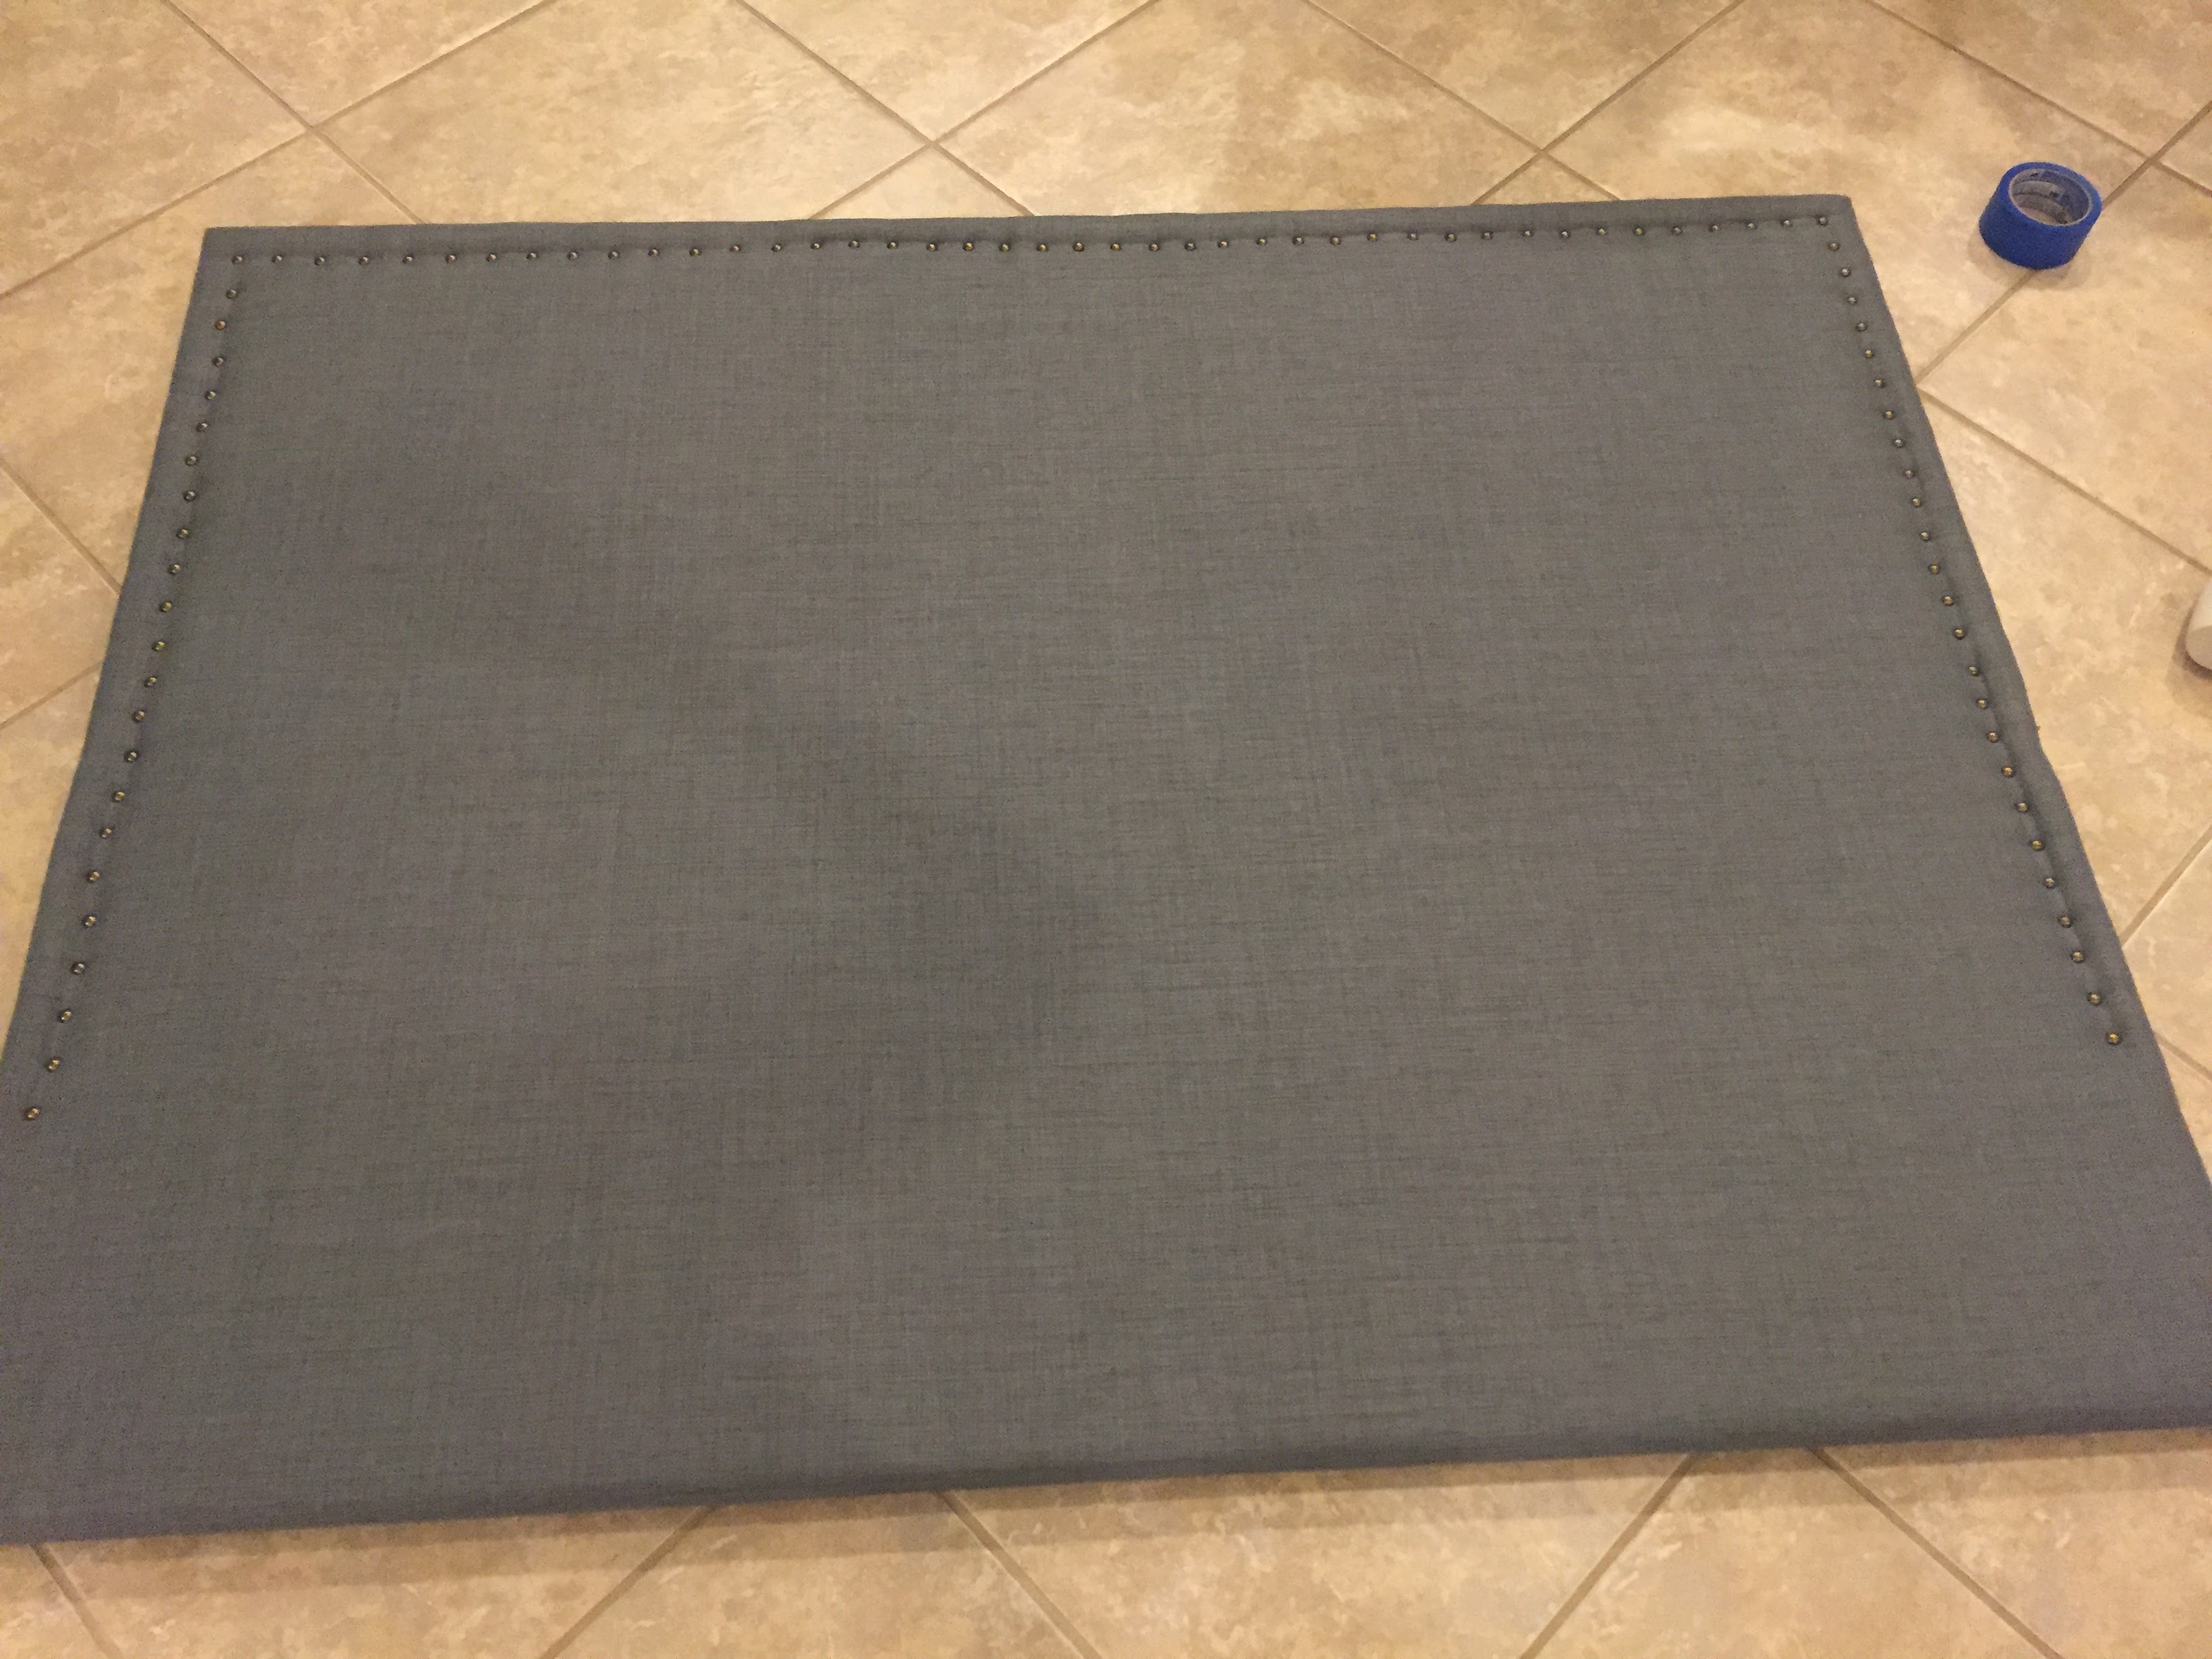
*Tip: nailheads either come individually or on a strip. My personal preference is to space them out, as the strip has them touching each other. Measure out the distance between each nailhead and mark it on the fabric. You can either do this ahead of time or as you go with each nailhead. Use a rubber mallet to pound the nailhead into the headboard. Be careful, as the nailheads can bend. Affix the nailheads on three sides of the headboard. It’s not entirely necessary to go all the way to the bottom on the left and right sides, as the bed will conceal those areas. Stand that puppy up, and voila! You’ve made a headboard!
Now, there are a number of different ways to handle affixing the headboard. You can affix it to the wall by securing a piece of wood to the bottom of the wall behind the bed to hold the headboard on like a shelf with brackets. You can affix the headboard directly to the wall. You can also affix the headboard directly to the bed frame, depending on the size and weight of the headboard. Because my headboard was significantly heavy, I knew the bed frame would not be able to support the weight. With the help of my handy dandy dad, we came up with a MacGyver type deal to mount the headboard at just the right height. We went to our local big box home improvement store and purchased a large PVC pipe that had a big circumference. We measured how high we wanted the headboard off the ground and cut 4 equal pieces of pipe that measured the distance from the ground to the bottom of the headboard. Next, we used a dremel tool to cut slits the width of the headboard thickness into the tops of the four pieces of pipe, and made sure they were deep enough to support the headboard upright without it leaning. We placed the four pieces of PVC pipe behind the headboard and slid the headboard into the slits.
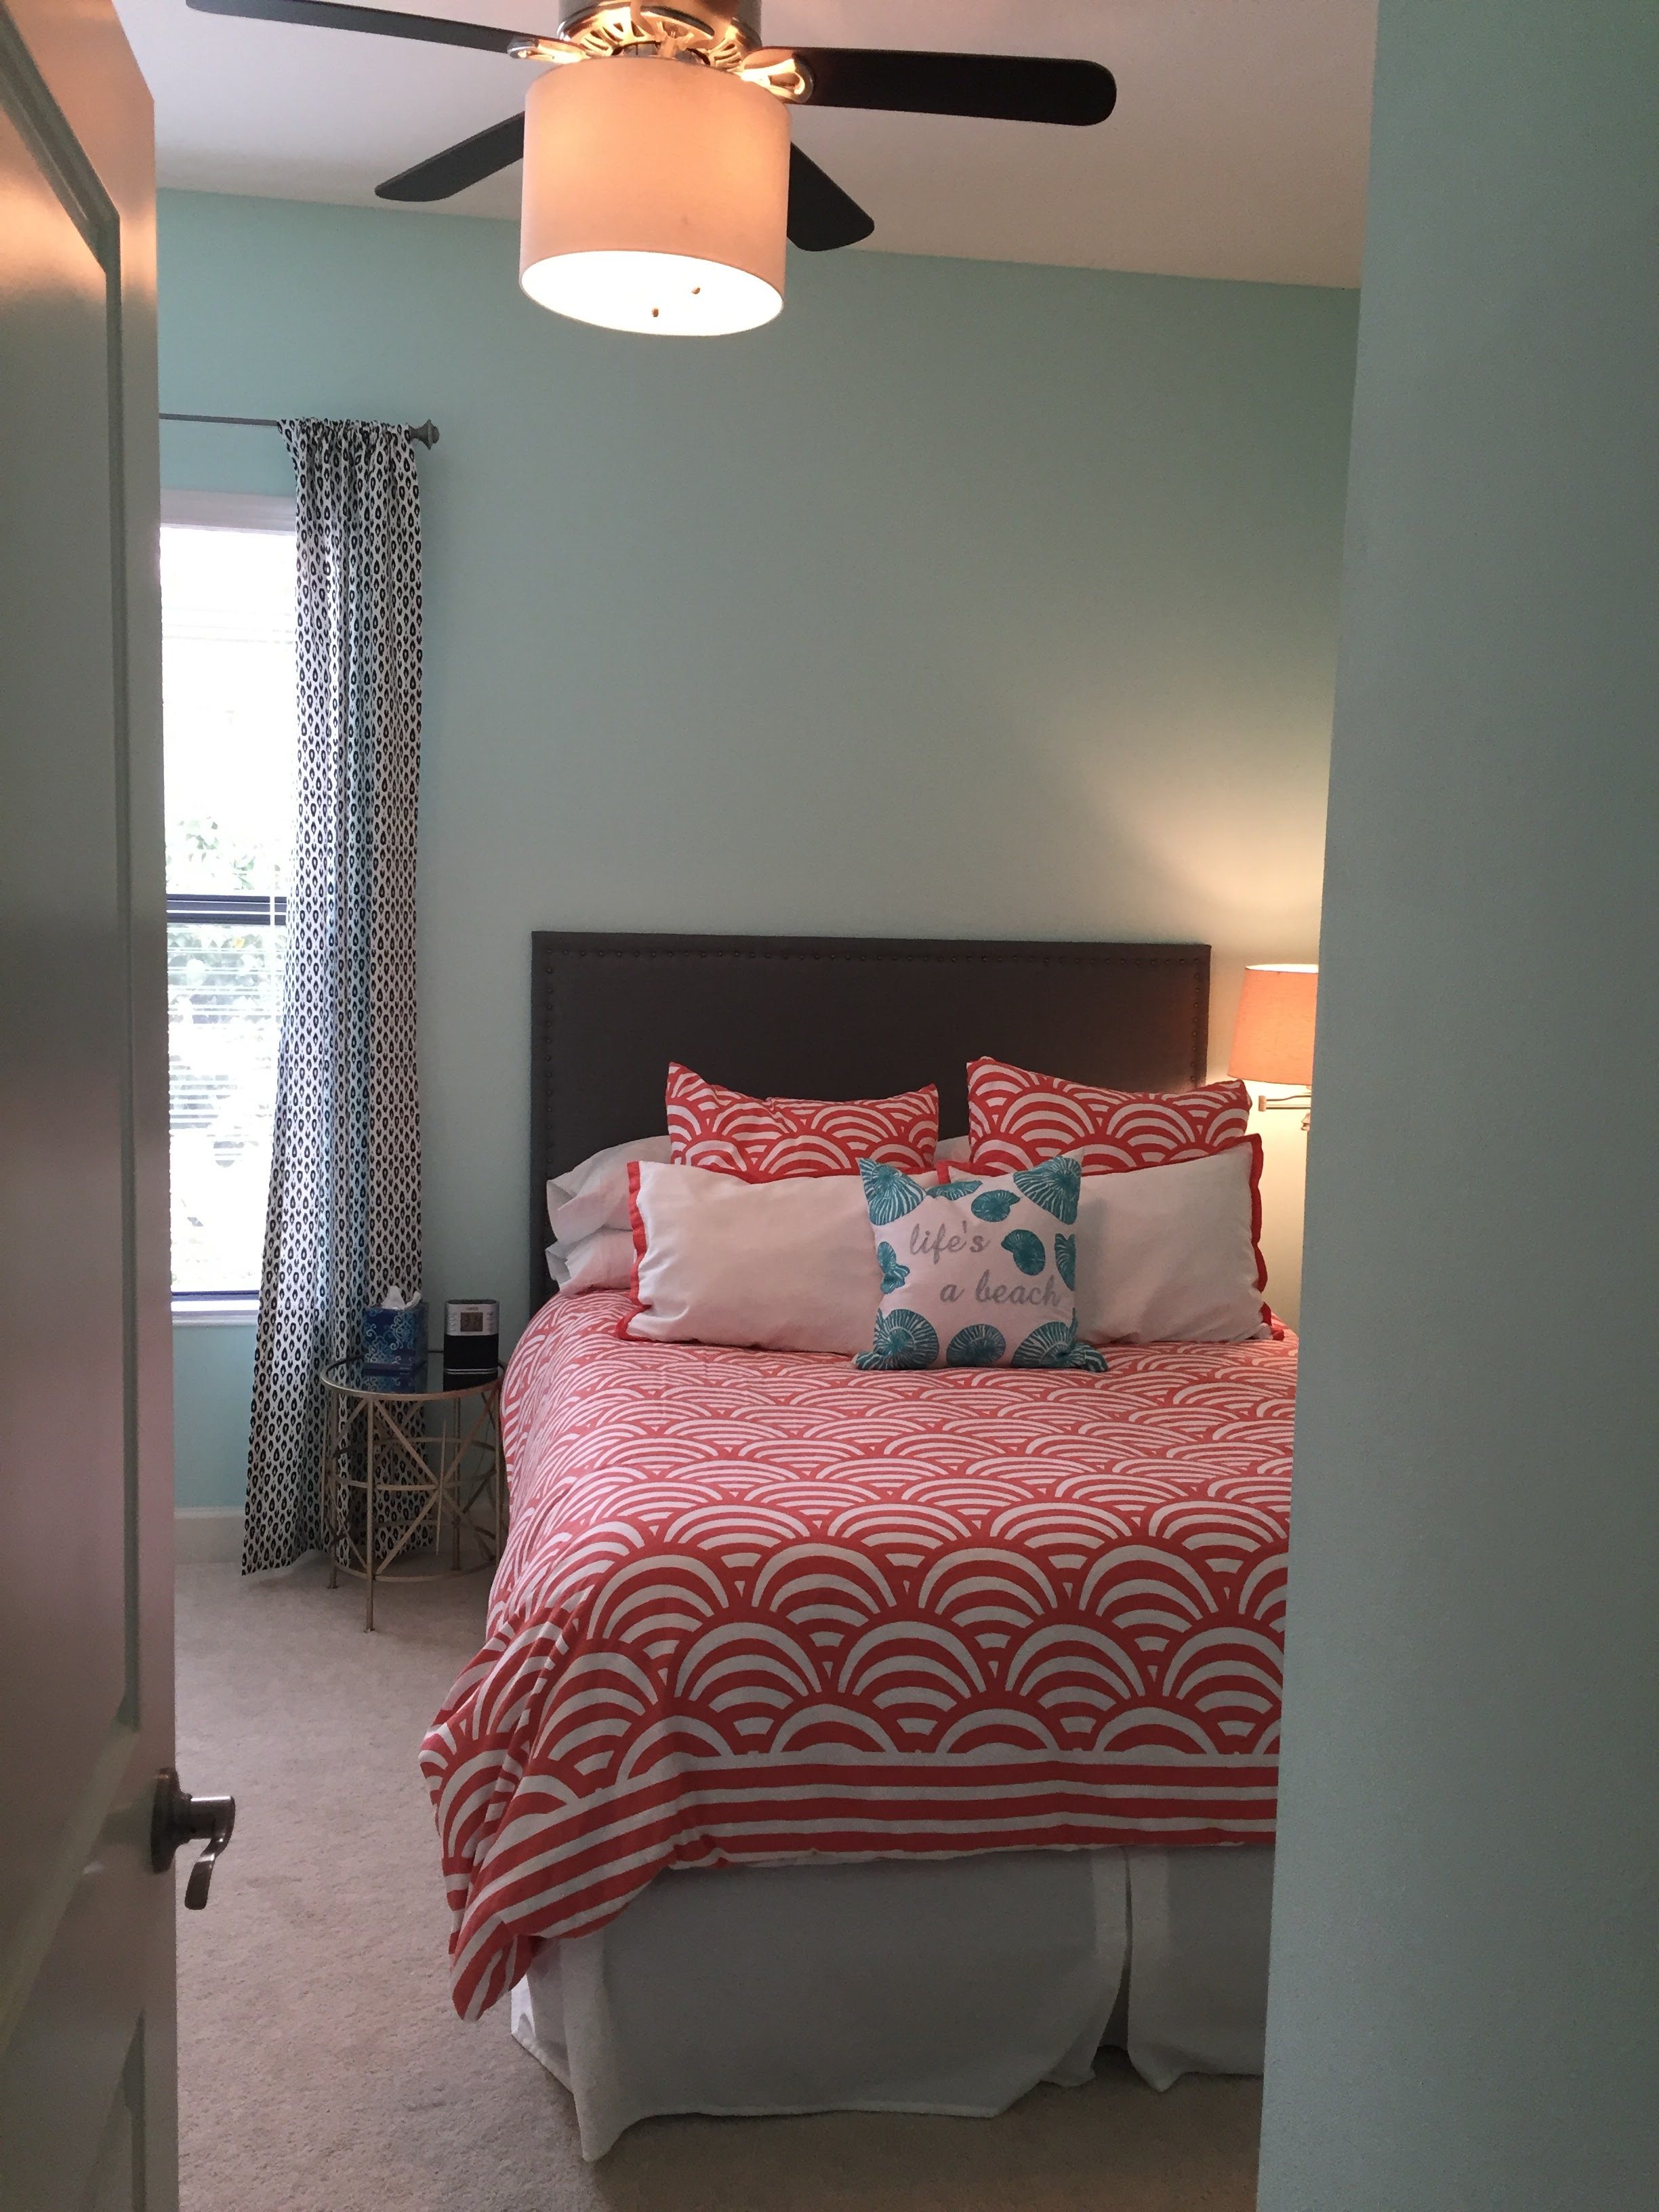
Check out the finished product! I was pleased with the way this headboard turned out. My biggest concern was that it was going to look like a cheap amateur DIY job-you know, the ones you’ve seen where it looks like a bad copy of an expensive version? Not this one, this one looks like the real deal and I didn’t blow my budget-win/win!
Materials:
-Plywood
–Foam
–Batting
-Fabric
-Nailheads: individual or on a strip
-Large PVC pipe
Tools:
–Laser level
–Rubber mallet
–Staple gun
-Spray adhesive
-Permanent marker
–Ruler
–Rubber gloves
–Scissors
–Tape measure
-Chalk
–Dremel power tool
As an Amazon Affiliate, I earn from qualifying purchases.
© Copyright 2018 Twinstant Gratification, LLC
Tamar Blazer is an attorney-turned-twin mom, with a passion for her family, friends, writing, good food, home decor and laughing. When she’s not lamenting on her lack of sleep, you can find her doing one of the too many projects she likes to take on, usually with a twin on either side.